
Now and then over the years I receive requests - do I re-paint furniture or know anyone who does. They still like the item - they own it - they just want a new look.
This is a DIY project that is not that difficult if you take your time. And basically - that's the only way it's going to get done economically in this city. If you paid for transit to a warehouse back and forth - then paid for labor and material - you may as well buy a new piece. This is something you and your helper can do together while the kids are away at school.
Let's start.....
Where do you get the supplies?
There is a small paint store on Swatow St. - a dead end street located up the block from the Hopewell Center off Queens Rd. There is a juice bar at the entrance of the street - you then take some stairs down to Swatow.

This is the correct one with the red awning!

DO NOT GO TO THIS ONE BELOW! It's further up the street - opposite side.

Show them photos of what you want - not a lot of English is spoken here. They may have to special order the glaze/primer - but it can be there in an hour.
Things you need:
1. Plastic drop cloth/ painters plastic - similar to an Amah's bag.
2. Sand Paper - fine 100 - 120 grit and course 60 - 80 grit (the higher the number the finer the grit)
3. Primer - a quart did both these pieces.
4. Good paint brush - maybe several sizes - for large areas and small areas.
5. Vaseline petroleum jelly
6. Water base acrylic paint. - small quart can is usually good enough
7. Finishing Wax or the same primer... see the below
Here are the 2 items I last painted in Hong Kong

Antique Chinese TV cabinet. I had the doors cut out and added frosted glass for the equipment to work.
It became this:

Coffee Table

These 2 items - coffee table and the TV cabinet were purchased in 2009. They had been lacquered with an oil base finish - originally they were cream but the oil turned them yellow in a short time. That is why I always say use water base paint and lacquer.
I think my living room is a little boring - because I didn't invest in expensive pieces. My pieces were not meant to return to the USA with me. We were only suppose to be here 3 years - and we are working on 9.
OK, NEXT.....
OK, NEXT.....
1. Place drop cloths around the piece so paint won't get on the wood floors. The blue and white stripe above is the plastic I'm talking about as a drop cloth. The paint will not bleed through.
2. Sand paper the entire piece with a fine 100 grit paper. You need to open up the old paint so that the new paint can adhere. Then wipe it down with a clean cloth to remove the dust.

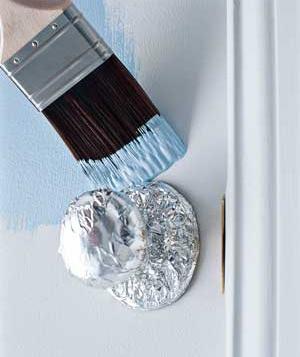
If you stop during your paint job - you can save your brush by wrapping it in tin foil - and place it in the fridge. This way you don't have to wash them out .... yet.

PRIMER/ GLAZE


PAINT - Eggshell or Satin.


3. I use something unconventional as a primer. The Clear Water base above - is actually a primer! YOU NEED THE PRIMER. The paint on your piece now is oil base. You cannot put water base over oil base. It will not adhere.
When you open the can , it looks milky, but it goes on clear. It won't hide the old color at this point - but it will coat it so that the next color can go on without a hint of the old. I find that one coat works. You should sand again after this step - it's best to eliminate brush marks. Again, with a finer grit.
With the primer and the paint - WATCH for drips - catch them early or you will have to sand them smooth!
4. Here's a trick when trying to distress the paint. Add Vasoline on the corners. Then paint over it.
You can read up on it here.

5. Crackle the paint. Crackle finish.


6. I did a quick first coat of this lighter blue. Then I added the Elmer's glue sporadically all over - thick and thin. I let it get tacky and then added a darker turquoise color. I thought this was the color I wanted. But you'll see later - it wasn't. Instead I used it as the underneath color - and when distressed - some of it showed thru.


This turquoise was not going to cut it - way too bright - but not bad for an under coat. So I mix up some left over paint and made a light taupe . The TV cabinet in the back was already painted.


7. I used the darker brown - that was used on the TV console on the drawer. You can see the glue worked here to get the crackle look. I sanded it down to get more to show. I also used the Vaseline around the drawer pull to protect it from paint. Also wrap the hanging part in plastic wrap.
Another way to protect handles when painting.

8. I then sanded the edges with a stronger grit to show the original paint and some of the turquoise. The Elmer's Glue trick looked sloppy - didn't get the crackle effect I was after - but it did help make the piece look older. I would only do this on a small piece like this.


9. To lock in the paint - you can achieve this two different ways. One - use the same glaze/primer - but it will have a slight shine to it.
Here's one I did for a customer because it came in too yellow from the factory. The clear primer was used to lock in the shabby chic look. And I painted the hardware white also to tone it down. I would then suggest to sand it one more time with the finer grit to smooth out the finish.

Or go to Shambula at Horizon Plaza and they carry wood furniture wax. Use the clear. The dark wax will antique the piece. This will give it a matte finish.


YOU ARE DONE!
Before

After


Items I painted over the summer in the USA

Before

After - and I added some nice single knobs not shown.

Before

After

Before

After

A pair of wonderfully made dressers that are danish modern design.

BEFORE


AFTER - and I added new fabric.
I had these curtains made in Shenzhen. I used them in two homes.
Oh, and I also painted the wall unit in the background!

Basically - don't be scared of the project. It will probably look better afterwards than it does now. There is a reason you wanted a new look.
Just do it and enjoy your outcome.

No comments:
Post a Comment